12 Unusual Light Shaping Tools for Creative Portrait Photos

One of the most frustrating things I see is photographers limiting their knowledge of light to one modifier. So much so, that there are people who can build whole portfolios with just one single type of light. While this is not wrong, it must get boring for the viewer after some time. That is why I went searching for some of the most unusual light shaping tools.
Here are 12 that I found and tested, in no particular order. Note that some products may be discontinued, so you may need to find them on the used market or rent them if you’re interested in trying them yourself.
#1. Narrowbeam Reflector

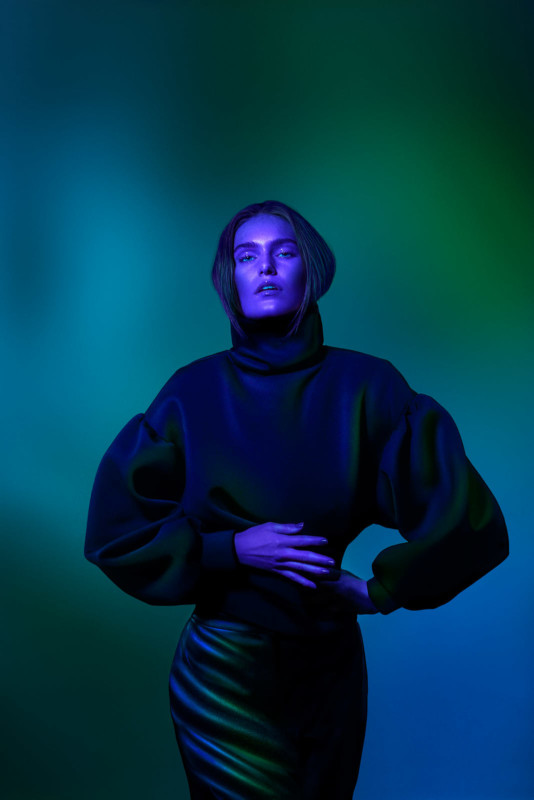
The Profoto Narrow-Beam reflector is made from highly reflective metal and can be used to create either very even light patterns with little falloff or the opposite. Because it can create even patterns with no falloff, it’s perfect for lighting backgrounds. On the other hand, when used as a modifier with dramatic falloff, it can produce a narrow beam (pun intended) that will light up just the face of a model such as in the image below. In order to light her up purple, I focused a narrow beam of light on her.
Hair&Makeup: Alice Högberg // @som_alice
Styling: Alina Ellstrom // @Alinaellstrom
Model: Sanna Bjelm // @sannabjelm
Agency: Sweden Models Agency // @swedenmodelsagency
Post-Production: Zahar // @justlike_magic
#2. Cine Reflector

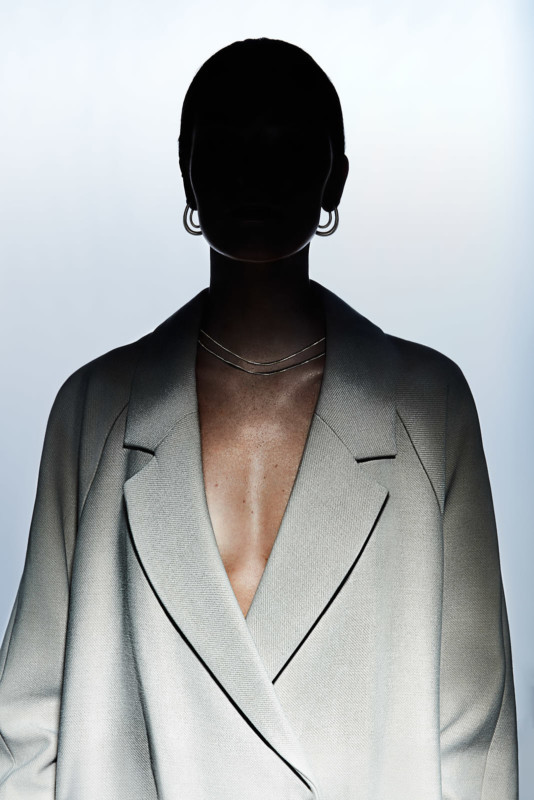
The Profoto Cine Reflector is a rather versatile light shaping tool originally made for video usage. In simple terms, it’s a regular Profoto zoom reflector to which you can attach various lenses, barn doors, and even a PAR. Out of the 5 lenses provided, I used the Fresnel in order to create the dramatic falloff you see. Further, I attached barn doors to get a horizontal penumbra. Lastly, a PAR (mirror-like cone inside of the reflector) increased my light output and gave it even more specularity.
Hair&Makeup: Alice Högberg // @som_alice
Styling: Alina Ellstrom // @Alinaellstrom
Model: Sanna Bjelm // @sannabjelm
Agency: Sweden Models Agency // @swedenmodelsagency
Post-Production: Zahar // @justlike_magic
#3. ZoomSpot

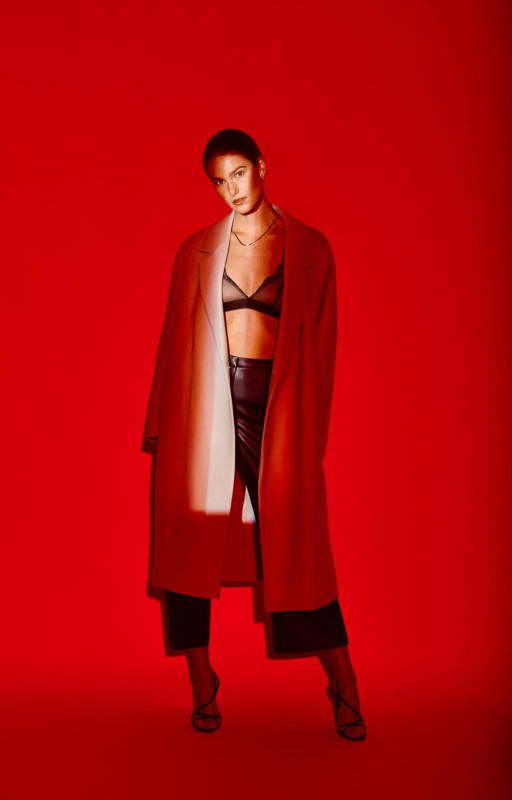
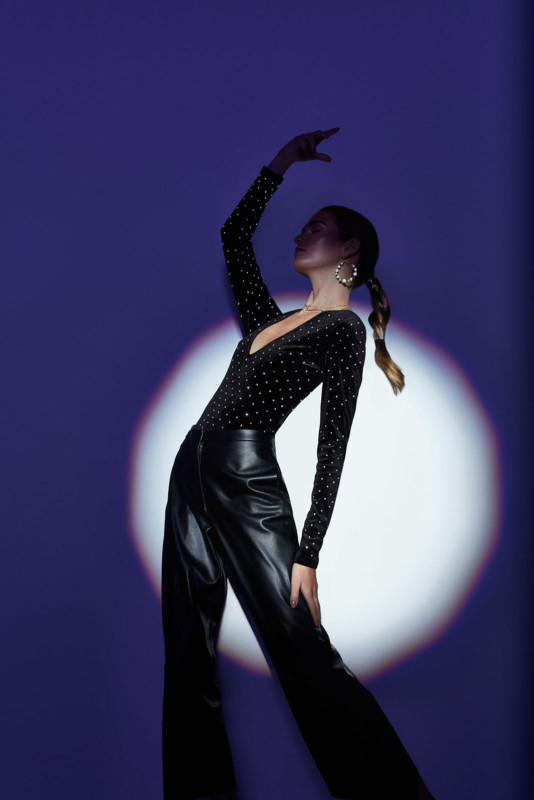
The Profoto ZoomSpot is a modifier that uses optical lenses to produce very fine light patterns. In a way, it is a very advanced version of an optical snoot. The beauty of a ZoomSpot is that it has controls that let you adjust focus and shadow edge width. I used the ZoomSpot for two images to show two functions.
Firstly, I used the ZoomSpot’s four metal shutters to create the strip of light you see on the model. Making it slightly out of focus let me have an interesting transition between the red fill and white key.
Hair&Makeup: Alice Högberg // @som_alice
Styling: Alina Ellstrom // @Alinaellstrom
Model: Sanna Bjelm // @sannabjelm
Agency: Sweden Models Agency // @swedenmodelsagency
Post-Production: Zahar // @justlike_magic
Secondly, I wanted to create a theatrical effect with it. Here I used the iris which let me create the circle you see.
Hair&Makeup: Alice Högberg // @som_alice
Styling: Alina Ellstrom // @Alinaellstrom
Model: Sanna Bjelm // @sannabjelm
Agency: Sweden Models Agency // @swedenmodelsagency
Post-Production: Zahar // @justlike_magic
#4. Striplight

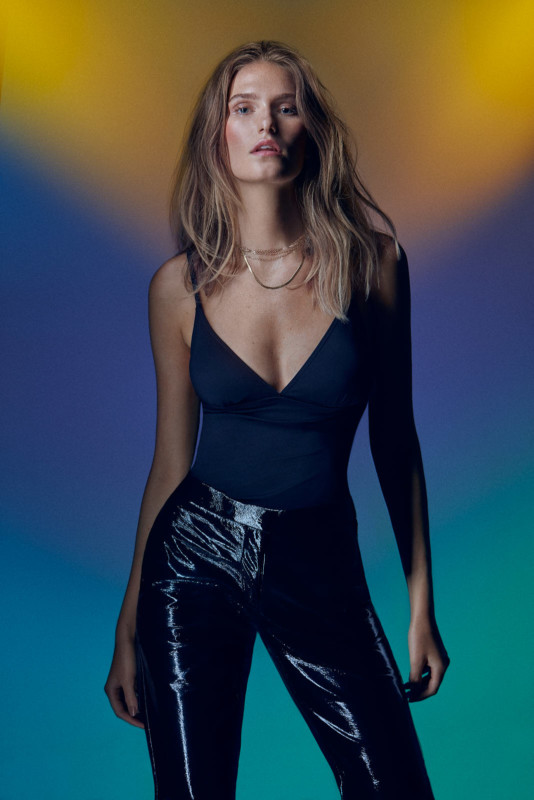
The striplight is like a stripbox, but it is a lot more expensive and a lot more niche in its application. The problem most softboxes have is that they can never produce a perfectly straight and even light. Despite the double layer of diffusion, there is still a noticeable hotspot in the middle and a gradual falloff towards the edges. It doesn’t make a difference if the light you use has a recessed or exposed flash tube, all the matters is that light is concentrated in one spot.
A striplight solves that problem by having an even light distribution. This, essentially means three long flash tubes that create a perfectly even narrow strip of light. This does imply needing several generators to run the system. Striplight XL needs two generators, while M and S need one.
Hair&Makeup: Alice Högberg // @som_alice
Styling: Alina Ellstrom // @Alinaellstrom
Model: Sanna Bjelm // @sannabjelm
Agency: Sweden Models Agency // @swedenmodelsagency
Post-Production: Zahar // @justlike_magic
This is useful when reflections are crucial, such as when working with latex or other shiny surfaces.
#5. HardBox

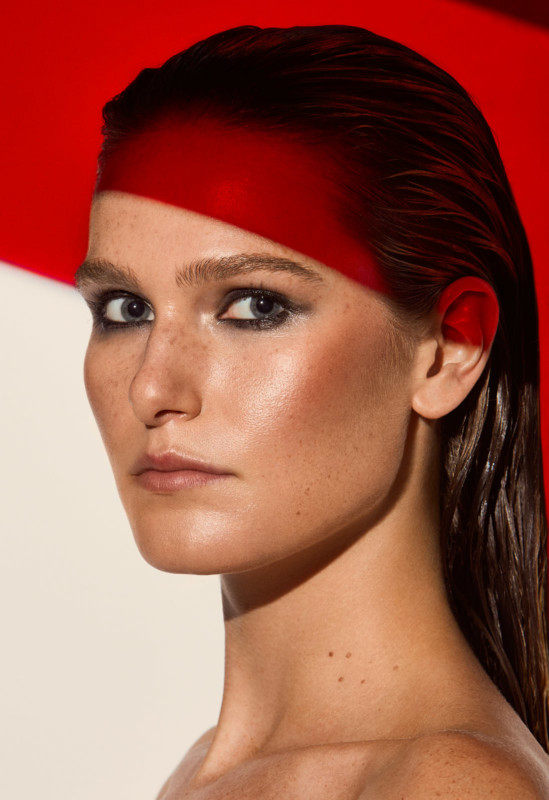
The hardest light you can get. The Profoto HardBox is essentially a modifier that minimizes the size of your light source. The way it works is by making the flash tube smaller. Every flash tube has a horseshoe shape which is relatively round. The beauty of a HardBox is that it takes that round tube and turns it into a small strip of light by turning the flash tube sideways. The HardBox has a black interior, so a lot of light is absorbed. Because of this, it can get very hot, I was in for an unpleasant surprise.
Hair&Makeup: Alice Högberg // @som_alice
Styling: Alina Ellstrom // @Alinaellstrom
Model: Sanna Bjelm // @sannabjelm
Agency: Sweden Models Agency // @swedenmodelsagency
Post-Production: Zahar // @justlike_magic
The light it produces has razor-sharp shadow edges and can be perfect for bringing out detail in your subject. It can also be used with gels as I did in the image below. In order to create this look, I had just one HardBox placed far away. In order to create the red color effect, I found a large gel and placed it as close to the model as I could. In fact, you see a little bit of the gel in the top right corner. Nonetheless, that way, I would get a sharp edge from red to white.
#6. Ringflash

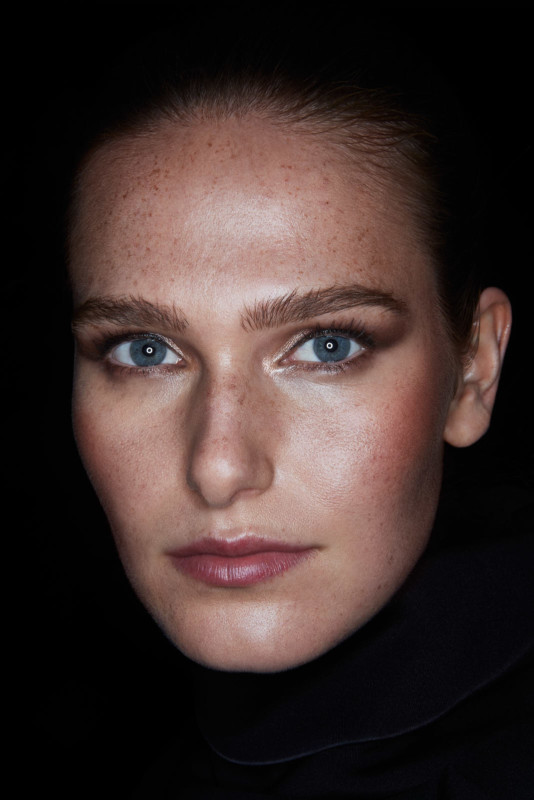
The ringflash is another must-try light shaping tool. It’s an easy way to get a “soft” light without taking up any space. The magic of the ringflash is that it creates a perfect shadowless light. Well, there are shadows but we don’t see them because they’re precisely behind the model. This is because the light direction is coaxial with the lens. You can try achieving a similar effect by placing a Speedlight very close to the lens, however, the result will be far from a ringflash. An easy way to tell a ringflash was used is by looking at the catchlights. In my photo they are round.
Hair&Makeup: Alice Högberg // @som_alice
Styling: Alina Ellstrom // @Alinaellstrom
Model: Sanna Bjelm // @sannabjelm
Agency: Sweden Models Agency // @swedenmodelsagency
Post-Production: Zahar // @justlike_magic
The image I created using a ringflash is an intimate portrait. Because the light produced is so soft, it was perfect for capturing a flattering image of the model. It was also crucial for me to focus only on the face, allowing the rest to blend. In order to achieve this, I placed 2 flags on either side and used a black background that was very far away from where the model was sitting.
#7. Flooter

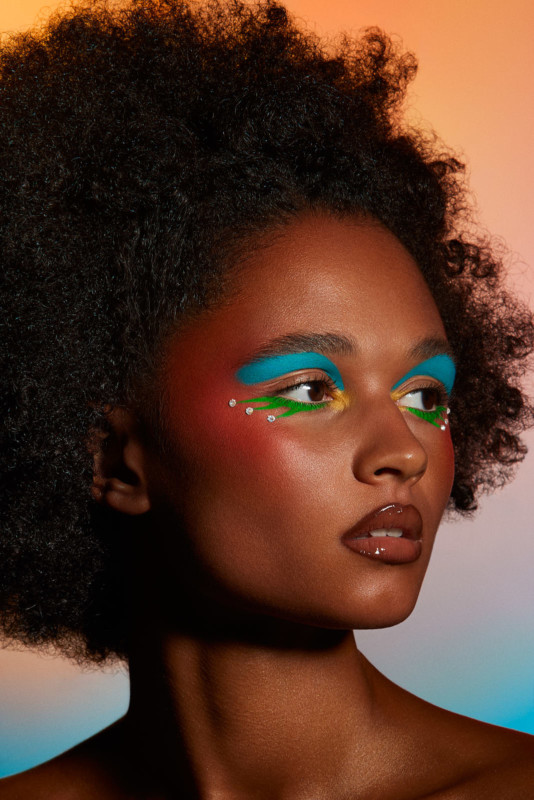
The Broncolor Flooter can be described as a Fresnel lens is a modifier that creates a classic movie light. A Fresnel lens is ideal for creating a contrasting light with a long throw and dramatic falloff. Another useful feature of a Fresnel is the ability to focus the beam. The Flooter can be used to light up large sets as well, for you can create wide beams with it.
Hair&Makeup: Karina Jemelyjanova // @karinajemelyjanova
Model: Francesca // @frxnciska
Agency: Face Model Management Hungary // @facemodelmanagementhungary
Post-Production: Zahar // @justlike_magic
#8. P45 Reflector

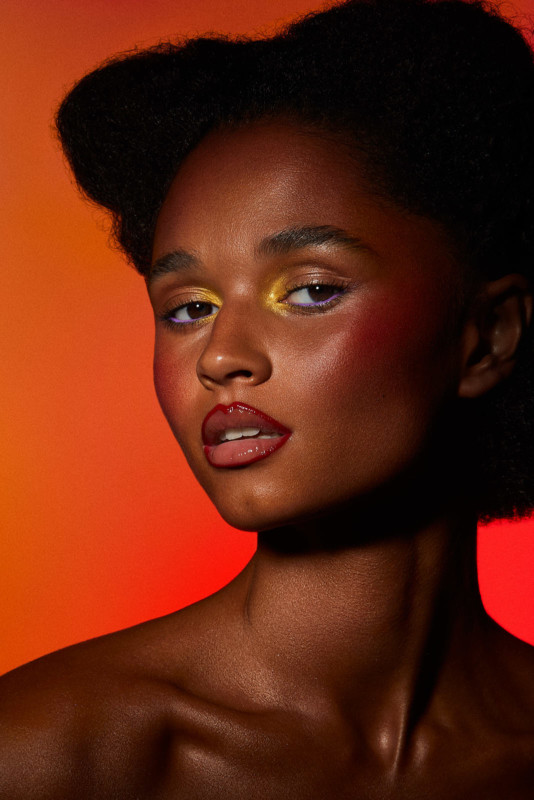
Broncolor’s P-series reflectors have a numbering system where the digits reflect (pun intended) the light spread. Tightest of them all: P45. It is not very common to use such a long throw reflector, but that depends on what your goal is. The beauty of a long-thrown reflector is that it can be used to produce hard contrasted light.
Hair&Makeup: Karina Jemelyjanova // @karinajemelyjanova
Model: Francesca // @frxnciska
Agency: Face Model Management Hungary // @facemodelmanagementhungary
Post-Production: Zahar // @justlike_magic
The image you see is a prime example of using a P45 reflector. Because of the narrow light spread, I placed it fairly close in order to get a dramatic falloff on the neck. Further, I used barn doors to limit spill on the hair and the rest of the model’s body.
#9. Satellite Staro

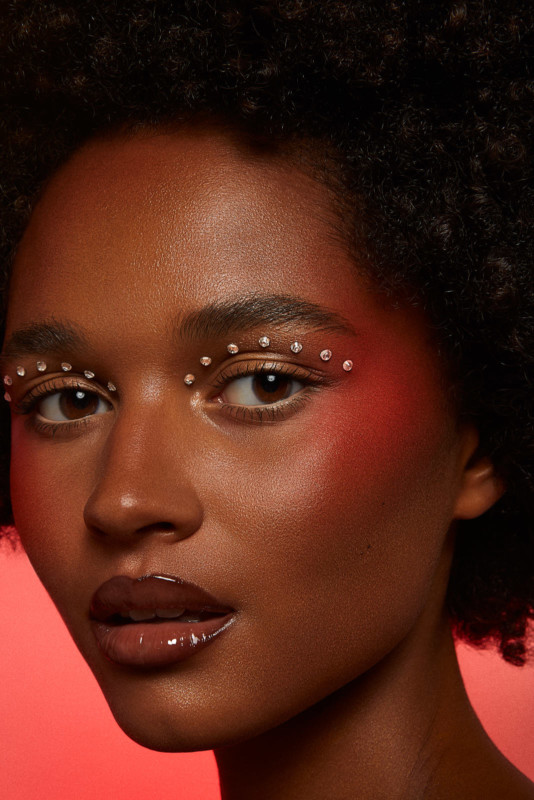
The Broncolor Satellite Staro is a large perfectly round modifier that is diffused. Being large helps it create soft light while being diffused works towards evening out the light spread. As you can probably tell, it will be one of the best modifiers to use for classic beauty photography.
Hair&Makeup: Karina Jemelyjanova // @karinajemelyjanova
Model: Francesca // @frxnciska
Agency: Face Model Management Hungary // @facemodelmanagementhungary
Post-Production: Zahar // @justlike_magic
This is exactly what I did. The makeup look had very soft tone gradients which begged for a soft beauty light. Unlike the beauty dish, the Satellite Staro produces a perfectly even light, while the beauty dish has a “sweet spot” in the middle.
#10. Pulso F4 Spotlight

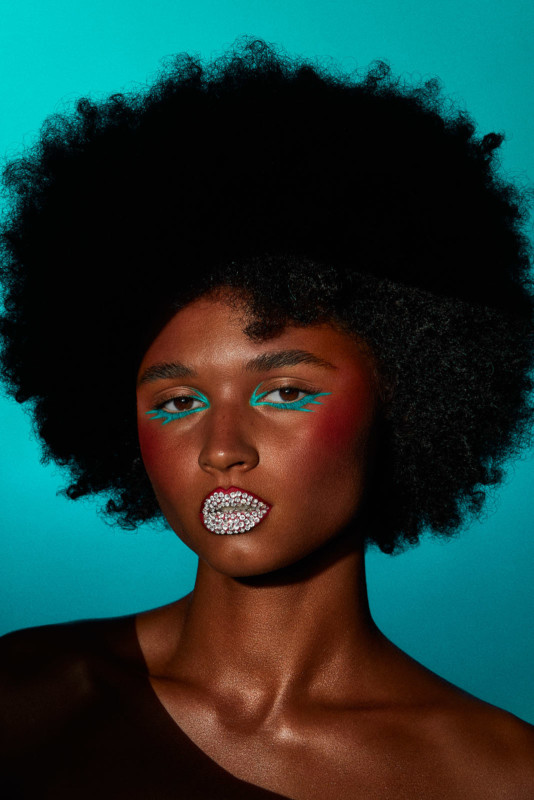
The Broncolor Pulso F4 Spotlight is a modifier that can have multiple functions. By default, it comes with a Fresnel lens which will let you focus the light to some degree. To be an absolute control freak with your light, you will need a projection attachment. It will be like an optical snoot, but this one (unlike the ZoomSpot) is designed for much finer patterns. As you can clearly see, the circle is perfectly focused with a razor-sharp edge. In fact, you can create your own gobo masks and project them using the Pulso F4 Spotlight.
Hair&Makeup: Karina Jemelyjanova // @karinajemelyjanova
Model: Francesca // @frxnciska
Agency: Face Model Management Hungary // @facemodelmanagementhungary
Post-Production: Zahar // @justlike_magic
#11. Mini-Satellite
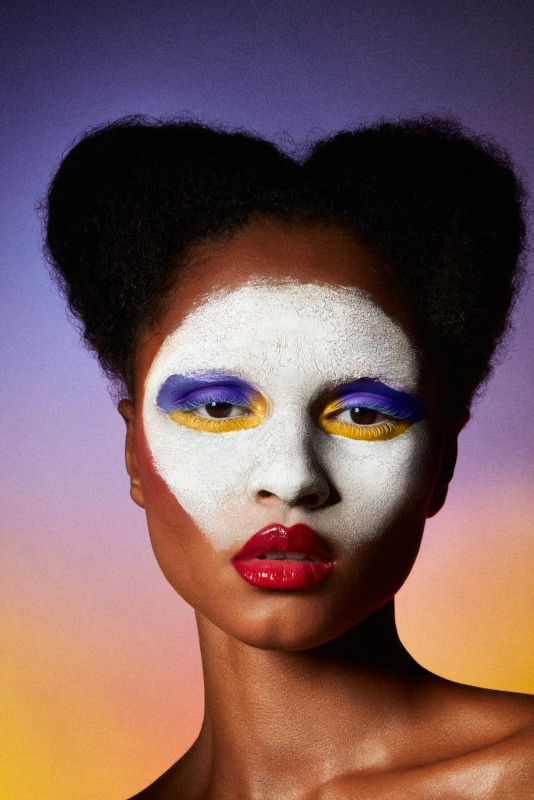
The Broncolor Mini-Satellite is a highly reflective large modifier that creates a focused beam of light. In a way, it acts as a mirror. The light created is exceptionally hard and contrasted, moreover, it is closest to real sunlight. A Mini-Satellite will bring out every detail, as well as catch any reflections.
For the image I took with the Mini-Satellite, I was looking for a modifier that would give me detail in the white gesso on the face, as well as catch the metallic texture in the makeup. I deliberately placed it rather low in order to get a sharp triangular nose shadow.
Hair&Makeup: Karina Jemelyjanova // @karinajemelyjanova
Model: Francesca // @frxnciska
Agency: Face Model Management Hungary // @facemodelmanagementhungary
Post-Production: Zahar // @justlike_magic
Lastly, because the mini satellite produced a very focused beam of light, I was able to direct it away from the hair, which added more form and structure to the whole image.
#12. Boxlite

The Broncolor Boxlite is yet another specialist modifier used commonly for product photography. The reason being is that it produces an even light spread with fine edges which is exactly what one needs when working with shiny reflective surfaces. The Boxlite I used was rather small, and I placed it close to the model to get dramatic falloff on the neck as well as a clearly visible straight reflection edge on the brush.
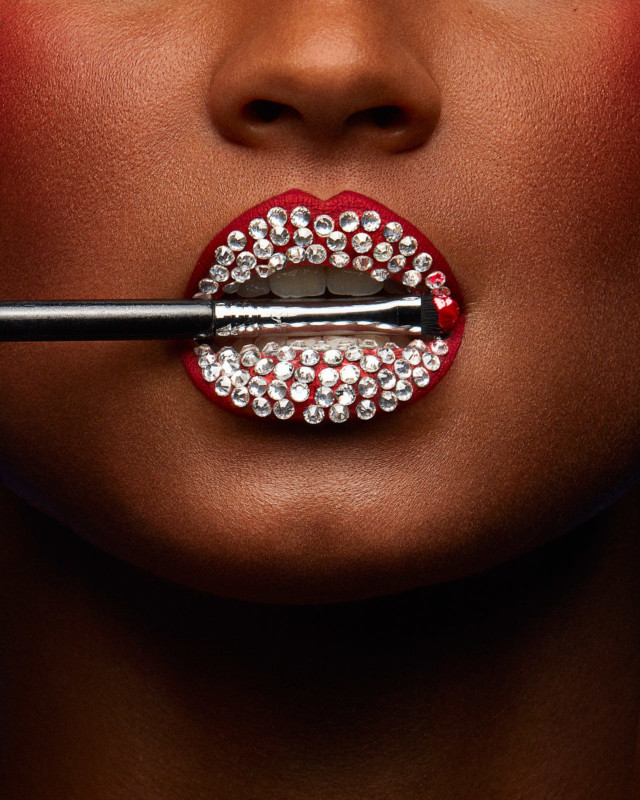
Hair&Makeup: Karina Jemelyjanova // @karinajemelyjanova
Model: Francesca // @frxnciska
Agency: Face Model Management Hungary // @facemodelmanagementhungary
Post-Production: Zahar // @justlike_magic
Closing Thoughts
These are just some of the unusual modifiers that exist out there. In fact, there is an infinite number of modifiers. You could even use an IKEA flashlight and a glass prism to make some very unusual and unique light. So, what is an unusual light modifier? Everything that light interacts with that you use for your photo. Moreover, these modifiers mentioned in this article are all expensive and all bar one cost north of one grand. Hence, it rarely makes sense for you to buy them.
I would, however, encourage you to rent as many as you want to and create photos using the modifiers I mentioned in this article.